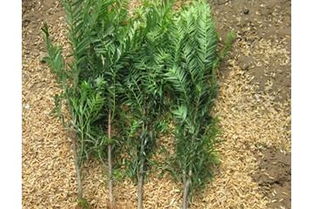
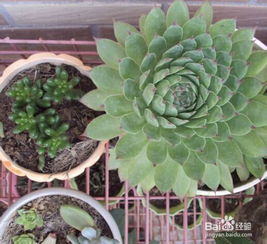
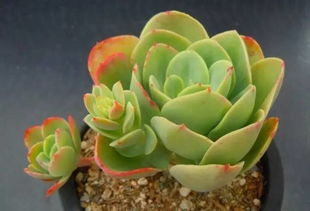
鸭脚木图片怎么修剪
修剪鸭脚木图片的步骤如下:
1. 打开一款图像编辑软件,例如Adobe Photoshop或GIMP。
2. 导入需要修剪的鸭脚木图片。
3. 使用选择工具(如矩形选择工具或套索工具)选择要保留的部分。确保选择的区域包含整个鸭脚木。
4. 在菜单栏中选择“编辑”>“剪切”或使用快捷键Ctrl+X(Windows)/Cmd+X(Mac)剪切选择的区域。
5. 创建一个新的图像或打开另一个图像,作为修剪后的鸭脚木图片的背景。
6. 在新的图像中,选择“编辑”>“粘贴”或使用快捷键Ctrl+V(Windows)/Cmd+V(Mac)将剪切的鸭脚木粘贴到新的图像中。
7. 使用移动工具将鸭脚木图片移动到所需的位置。
8. 如果需要,可以使用图像编辑工具(如修剪工具、调整图像大小工具或旋转工具)对鸭脚木图片进行进一步的调整。
9. 最后,保存修剪后的鸭脚木图片。选择“文件”>“保存”或使用快捷键Ctrl+S(Windows)/Cmd+S(Mac)保存图片。
完成上述步骤后,您就成功地修剪了鸭脚木图片。

Sure, here are some additional steps you can take to further refine and enhance the trimmed duck foot wood image:
10. Use the crop tool to remove any unwanted edges or areas in the image. Adjust the crop boundaries to focus on the main subject, the duck foot wood.
11. Use the clone stamp or healing brush tool to remove any blemishes, scratches, or imperfections on the duck foot wood. This will help make the image look cleaner and more polished.
12. Adjust the brightness, contrast, and saturation levels of the image to enhance its overall appearance. You can use the levels or curves adjustment tool to fine-tune the tonal range and color balance.
13. Apply sharpening or noise reduction filters to improve the clarity and sharpness of the image. Be careful not to overdo it, as excessive sharpening or noise reduction can result in an unnatural look.
14. Consider adding some artistic effects or filters to give the image a unique and creative touch. Experiment with different filters, such as vignette, sepia, or black and white, to achieve the desired effect.
15. Finally, save the edited image in a suitable file format, such as JPEG or PNG, to preserve its quality and compatibility with various devices and platforms.
By following these additional steps, you can further enhance and refine the trimmed duck foot wood image to make it visually appealing and professional-looking.

1. 打开一款图像编辑软件,例如Adobe Photoshop或GIMP。
2. 导入需要修剪的鸭脚木图片。
3. 使用选择工具(如矩形选择工具或套索工具)选择要保留的部分。确保选择的区域包含整个鸭脚木。
4. 在菜单栏中选择“编辑”>“剪切”或使用快捷键Ctrl+X(Windows)/Cmd+X(Mac)剪切选择的区域。
5. 创建一个新的图像或打开另一个图像,作为修剪后的鸭脚木图片的背景。
6. 在新的图像中,选择“编辑”>“粘贴”或使用快捷键Ctrl+V(Windows)/Cmd+V(Mac)将剪切的鸭脚木粘贴到新的图像中。
7. 使用移动工具将鸭脚木图片移动到所需的位置。
8. 如果需要,可以使用图像编辑工具(如修剪工具、调整图像大小工具或旋转工具)对鸭脚木图片进行进一步的调整。
9. 最后,保存修剪后的鸭脚木图片。选择“文件”>“保存”或使用快捷键Ctrl+S(Windows)/Cmd+S(Mac)保存图片。
完成上述步骤后,您就成功地修剪了鸭脚木图片。
Sure, here are some additional steps you can take to further refine and enhance the trimmed duck foot wood image:
10. Use the crop tool to remove any unwanted edges or areas in the image. Adjust the crop boundaries to focus on the main subject, the duck foot wood.
11. Use the clone stamp or healing brush tool to remove any blemishes, scratches, or imperfections on the duck foot wood. This will help make the image look cleaner and more polished.
12. Adjust the brightness, contrast, and saturation levels of the image to enhance its overall appearance. You can use the levels or curves adjustment tool to fine-tune the tonal range and color balance.
13. Apply sharpening or noise reduction filters to improve the clarity and sharpness of the image. Be careful not to overdo it, as excessive sharpening or noise reduction can result in an unnatural look.
14. Consider adding some artistic effects or filters to give the image a unique and creative touch. Experiment with different filters, such as vignette, sepia, or black and white, to achieve the desired effect.
15. Finally, save the edited image in a suitable file format, such as JPEG or PNG, to preserve its quality and compatibility with various devices and platforms.
By following these additional steps, you can further enhance and refine the trimmed duck foot wood image to make it visually appealing and professional-looking.
来源:本文由百花居原创撰写,欢迎分享本文,转载请保留出处和链接!